
Vodiči
How to Mount a Roof Tent on a Car: Step-by-Step Guide
4. 9. 2026 · 12 min čitanja
Proper roof tent installation affects three key things: safety while driving, stability while sleeping and the lifespan of both the tent and the roof rack. It is therefore not just a matter of placing the tent on the roof and tightening a few bolts.
A safe system consists of three mutually compatible parts: your car, the roof rack or crossbars, and the mounting system of the specific tent. If one of these components is unsuitable or you exceed its permitted load capacity, the entire system can become unsafe.
In this guide, we will show you how to mount a roof tent on roof racks step by step, what to check before lifting the tent onto the car and which mistakes to avoid during your first installation.
What You Need Before Mounting a Roof Tent
Before you start taking bolts out of the packaging, make sure the specific tent can actually be mounted safely on your car.
The most important things are compatible roof racks, the correct mounting hardware and suitable tools.
Compatible Roof Racks or Crossbars
Not every roof rack is automatically suitable for mounting a roof tent.
First, check three figures:
- the maximum dynamic load capacity of the car roof,
- the maximum load capacity of the roof rack or crossbars,
- the weight of the roof tent itself, including mounting components.
The lowest limit in the entire system always applies.
For example, if your car roof can carry 100 kg while driving, but the roof crossbars have a maximum load capacity of 75 kg, you cannot use the 100 kg figure. In this case, the system limit is the load capacity of the crossbars.
The load on the roof also includes more than just the tent itself. You need to account for the weight of the roof rack and everything else that remains on the roof while driving.
Example:
Roof load capacity while driving: 80 kg
Roof rack weight: 6 kg
Roof tent weight: 62 kg
The total load while driving is 68 kg, so you remain below the vehicle’s 80 kg limit. However, you must also check whether the roof rack itself allows this weight.
Dynamic and Static Load Capacity Are Not the Same
Two different figures are often confused when it comes to roof tents.
Dynamic load capacity determines how much weight the roof or rack can safely carry while the vehicle is moving. This mainly includes the weight of the folded tent, the rack and accessories.
Static load capacity applies when the car is stationary. At that point, the system must safely support the tent together with the people and equipment inside.
Do not therefore include the weight of two sleeping people in the car’s dynamic load capacity. At the same time, do not automatically assume that every roof capable of carrying the tent while driving can support any amount of weight when stationary. Check both limits according to the specifications provided by the car, rack and tent manufacturers.
Check the Correct Crossbar Spacing
The crossbars must be spaced so that they match the mounting points and requirements of the specific tent.
If the spacing is too narrow, weight distribution may be worse and stability may be reduced. If it is too wide, it may not match the mounting rails on the underside of the tent.
Do not rely on one universal measurement. Before installation, measure the distance between the crossbars and compare it with the range permitted by the tent manufacturer.
Also check:
- whether both crossbars are parallel to each other,
- whether they are securely attached to the vehicle,
- whether the tent mounting brackets sit on a suitable section of the crossbar,
- whether the tent will block the boot or tailgate from opening,
- whether its position will interfere with the antenna or other roof-mounted components.
Mounting Hardware: What Should Be Included With the Tent
The specific mounting system varies depending on the manufacturer and tent model.
The package usually includes:
- mounting rails or tracks,
- bolts and nuts,
- lower mounting plates or brackets,
- washers,
- possibly adapters for a specific type of roof rack.
Before installation, lay out all the parts and compare them with the package contents listed in the instructions.
If even one mounting component is missing, do not replace it with a random bolt from your workshop. Use a component with the same dimensions, strength and intended purpose specified by the tent manufacturer.
What Tools Should You Prepare?
The exact sizes depend on the mounting system, but you will most commonly need:
- a set of ring spanners or ratchet wrenches,
- Allen keys,
- a screwdriver,
- a tape measure,
- a torque wrench if the manufacturer specifies an exact tightening torque,
- steps or a stable work platform,
- work gloves.
For your first installation, also prepare a soft blanket or a piece of cardboard. You can place it on the roof or next to the car to protect surfaces from scratches while handling the tent.
Checklist Before Mounting a Roof Tent
Before lifting the tent onto the roof, go through this short checklist.
| What to Check | Question Before Installation |
|---|---|
| Roof load capacity | Can the roof safely carry the rack + tent while driving? |
| Rack load capacity | Is its limit higher than the total load? |
| Tent weight | Do you know the weight of the tent including mounting components? |
| Crossbar spacing | Does it meet the tent manufacturer’s requirements? |
| Crossbar mounting | Are the crossbars correctly installed and securely tightened? |
| Mounting system | Is it compatible with the shape and dimensions of the crossbars? |
| Mounting components | Do you have all bolts, nuts, washers and brackets? |
| Tools | Do you have the correct wrench sizes and everything else you need? |
| Helper | Do you have at least one other person to help lift the tent? |
| Space around the car | Is the car parked on level ground with enough room to work safely? |
Only once all these points have been checked should you begin the actual installation.
How to Mount a Roof Tent Step by Step
The exact mounting method can vary between models. Always follow the installation instructions provided by the manufacturer of your specific tent.
However, the basic procedure is similar for most systems.
Step 1: Position the Roof Crossbars Correctly
First, position the crossbars according to the recommended spacing for your specific tent.
Measure the distance on both the left and right sides. Measuring only one side is not enough – a crossbar may be slightly angled, which can cause the tent to sit crooked.
After positioning them, check:
- that the spacing between the crossbars is equal on both sides,
- that the crossbars are securely attached to the car,
- that all mounting points are properly tightened.
Only then should you continue with the tent.
Step 2: Prepare the Tent Mounting Rails
Place the tent on a safe, flat surface so that you can access its underside.
Following the installation instructions, attach or adjust the mounting rails. On some models, they may already be installed at the factory, while on others they must first be bolted to the base.
Pay particular attention to the orientation of the rails. Their direction must match the way the tent will sit on the crossbars.
Also prepare the bolts and brackets you will need once the tent is on the car. Once the tent is on the roof, access to some areas may become significantly more difficult.
Step 3: Lift the Tent Onto the Roof
This is the part of the installation where damage to the car or the tent itself is most likely to occur.
A roof tent is not only heavy but also large and awkward to handle. Do not lift it onto the roof by yourself.
At least two people are ideal. For larger and heavier models, handling it with three or four people may be safer.
Before lifting:
- open any doors you need for access,
- remove objects around the car that you could trip over,
- agree which direction you will move the tent,
- lift it together and in a controlled manner.
First, place the tent safely on the crossbars. Only then make small adjustments and centre it.
Step 4: Centre the Tent on the Crossbars
Once the tent is on the roof, do not fully tighten it yet.
First, check its position from the front, rear and both sides.
Measure the distance between the edge of the tent and the sides of the vehicle on both the left and right. The tent should not be visibly shifted to one side.
Also check:
- whether the mounting rails sit correctly above the crossbars,
- whether the weight is distributed evenly,
- whether the tent interferes with opening the boot or tailgate,
- whether it is positioned unnecessarily too far forward or backward.
Practical tip: Before final tightening, open the boot or tailgate fully. This immediately shows whether the lid or spoiler touches the tent.
Step 5: Attach the Mounting Brackets
Once the tent is correctly positioned, you can attach it to the crossbars.
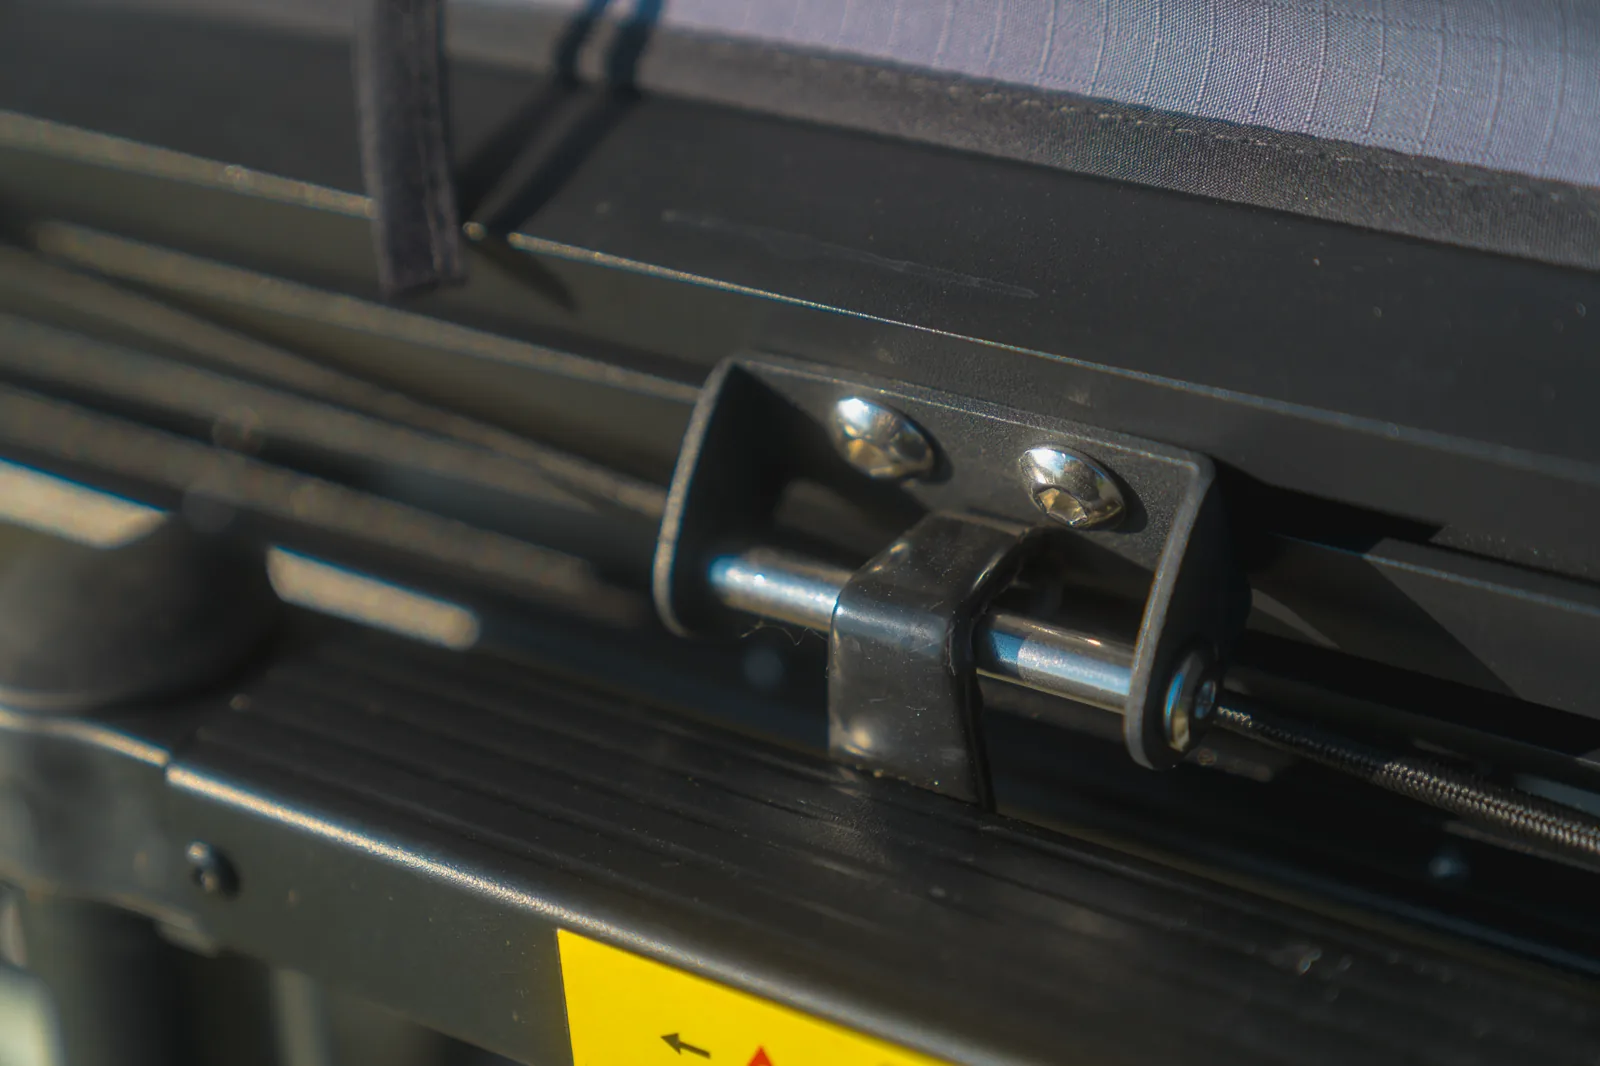
Insert the mounting bolts or brackets according to the manufacturer’s system and position the lower bracket so that it securely wraps around the crossbar.
In most cases, the tent is secured at a minimum of four mounting points.
Before tightening all connections, check that:
- the brackets sit flat,
- the bolts are not angled,
- no bracket sits on the edge of a crossbar,
- the mounting system does not press against a plastic cover or another unsuitable part of the rack.
Initially, leave all connections slightly loose. Perform the final tightening only once the entire tent is properly centred.
Step 6: Safely Tighten All Bolts
Tighten the bolts gradually and evenly.
Do not fully tighten one mounting point first and then move on to the others. It is better to move gradually between the individual points so that the tent is pulled evenly towards the rack.
If the manufacturer specifies a particular tightening torque in Nm, use a torque wrench and follow that value.
When it comes to bolts, “the tighter, the safer” is not true. Overtightening can damage the thread, mounting bracket, rail or the crossbar itself.
After tightening, check that there are no loose threaded connections or unused components left over.
Step 7: Carry Out a Final Safety Check
Before your first drive, inspect the entire system once again.
Check:
- all tent mounting points,
- the attachment of the roof crossbars themselves,
- the centring of the tent,
- sufficient clearance when opening the boot or tailgate,
- that the closed tent is properly locked and secured,
- the ladder and other accessories,
- all straps, buckles and covers required for driving.
Then firmly hold the tent and try to move it from side to side.
It should not move independently along the crossbars or have any play in the mounting points. When you apply more force, the movement should transfer to the whole vehicle rather than occur between the tent and the rack.
After your first test drive, stop and check the installation again. Follow the inspection intervals recommended by the tent and rack manufacturers, especially after driving on poor-quality roads or off-road terrain.
The Most Common Roof Tent Installation Mistakes
Even a relatively simple installation mistake can damage the tent, roof rack or vehicle.
Ignoring the Load Capacity of the Roof and Rack
It is not enough to know how much the tent weighs.
Include the weight of the rack and any other equipment on the roof in your calculation. Always compare the vehicle limit with the rack limit – the lower figure applies.
Incorrect Crossbar Spacing
Do not position the crossbars simply where they “look right”.
Their spacing must be compatible with the mounting system of the specific tent and with the approved mounting positions on the car.
Loose or Overtightened Bolts
Both extremes are a problem.
Loose bolts can create play while driving. Overtightening, on the other hand, can damage the thread or deform mounting components.
If the manufacturer specifies a tightening torque, follow it.
Poor Tent Centring
A tent that is significantly shifted to one side results in less even weight distribution.
Do not rely only on visual judgement when installing it. Use a tape measure and check the distances on both sides.
Forgetting to Check the Boot or Tailgate
The tent may be mounted correctly but positioned too far back.
You may only discover the problem when you open the boot or tailgate and its upper edge or spoiler hits the underside of the tent.
Always test the boot or tailgate before final tightening.
Installing the Tent Alone
Even if you can handle the bolting yourself, you should not lift the tent onto the car alone.
You risk scratching the roof, dropping the tent, damaging the crossbars or injuring yourself.
Tips That Will Make Installation Much Easier
Prepare your tools before you start. Once you are handling a heavy tent on the roof, you do not want to discover that you are missing the correct wrench.
Install on level ground. It will be easier to centre both the car and the tent, and you will not be working on a tilted vehicle.
Install during daylight. Allow enough time for your first installation. Starting at seven in the evening before leaving for a holiday the next morning is not an ideal plan.
Take photos of the correct installation. Detailed photos of the brackets, bolts and crossbar positions can be very helpful when removing and reinstalling the tent later.
Make a note of the crossbar position. If you remove the crossbars during the year, measure their spacing or discreetly mark their position. That way, you will not have to set everything up from scratch next time.
Treat the first few kilometres as a test. During your first drive, listen for any new sounds coming from the roof. Knocking, significant creaking or movement may indicate that you need to stop and inspect the installation.
Check the connections throughout the season. Vibrations while driving, off-road terrain and repeated opening and closing can affect the mounting over time. A quick inspection before a longer trip only takes a few minutes.
How Long Does It Take to Install a Roof Tent?
Allow enough time for your first installation.
First installation: approximately 45–90 minutes
Repeat installation by an experienced user: approximately 20–40 minutes
The time required depends on the type of tent, the roof rack design, accessibility of the mounting points and the number of people involved.
Tightening a few bolts often takes the least amount of time. During the first installation, most of the time is spent correctly positioning the crossbars, preparing the tent, lifting it safely and centring it precisely.
It is therefore not worth rushing the installation. Ten extra minutes spent checking everything is better than dealing with a loose tent while travelling.
Safe Installation Is the Foundation of Every Journey
A correctly installed roof tent should form one solid system with the roof racks on your vehicle. It should not move, have any play or be secured in a way that exceeds the limits of the car or roof rack.
Before installation, always check three basic things: load capacity, compatibility and correct crossbar spacing. During installation, work with at least one other person, carefully centre the tent and tighten all connections according to the manufacturer’s recommendations.
If you do not underestimate these steps, the next installation will be significantly faster – and instead of dealing with technical problems, you can head straight out on the road.